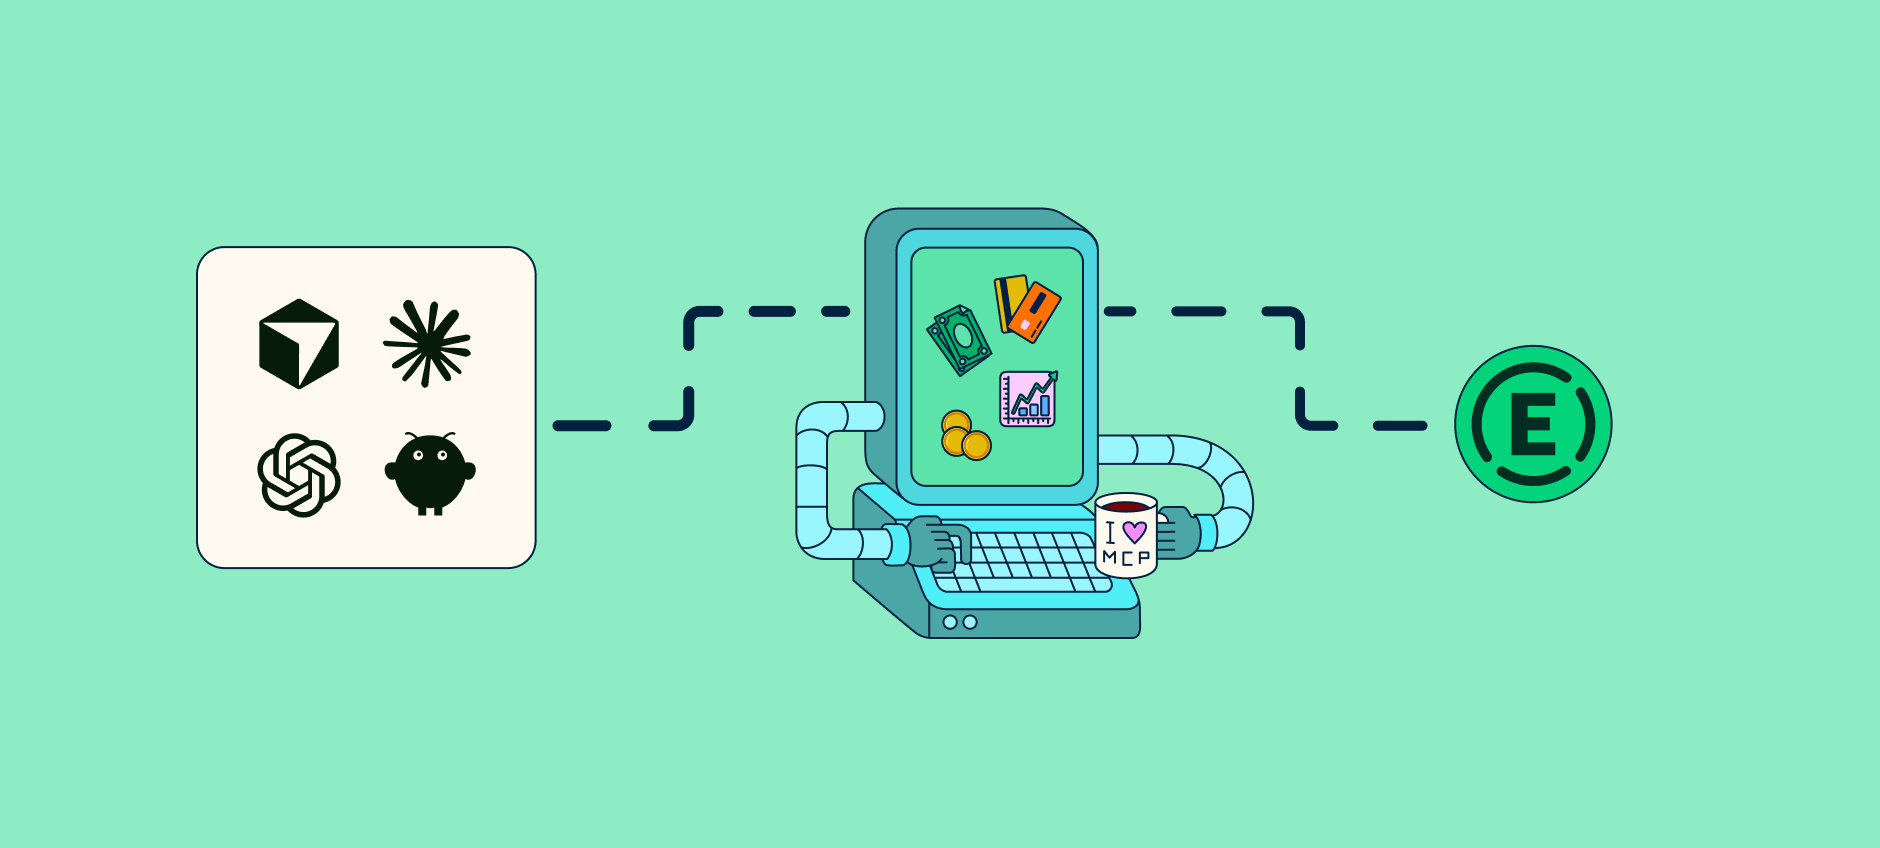
Connect Expensify MCP to Claude, Cursor, ChatGPT, and OpenClaw. Query Your Expenses in realtime.
If you want Claude or ChatGPT to analyze your Expensify data today, here's the workflow you're probably stuck with: export a CSV, upload it to the chat, and hope the file doesn't blow past the model's context window.
Every time the data changes, you export again. You lose the live link to categories, approvals, and receipts. And the second someone asks a follow-up question, you start over.
But now, there’s a better way. Expensify is the first Bring Your Own Card (BYOC) expense management MCP server. With the Expensify MCP, you can query expenses with AI the moment you connect it. Claude, Cursor, ChatGPT, and OpenClaw all work, with no admin seat, no contract, and no exports.
Key takeaways
- Expensify MCP connects Claude, Cursor, ChatGPT, and other MCP-compatible AI assistants directly to live Expensify data, allowing users to query expenses, receipts, reports, and invoices in realtime with natural language.
- No exports, API keys, contracts, or admin setup required. Users authenticate once via secure OAuth and can start analyzing expense data in under five minutes.
- Read-only by design. AI assistants can access and analyze the same realtime expense data available in Expensify, but cannot approve transactions, edit data, or move money.
What MCP is, in plain English
MCP (Model Context Protocol) is an open standard adopted by Anthropic, OpenAI, and Google that lets AI agents discover and call external tools without anyone building a one-off integration for each app.
The simplest way to think about it: MCP is the USB-C of AI assistants. Plug it in once, and your AI can talk to that service directly.
Expensify's MCP server lives at https://www.expensify.com/mcp. Sign in, authorize through an OAuth consent screen, and your agent can query expenses, reports, invoices, and receipts in realtime. It’s the same data you'd see in the app, surfaced through AI.
Why this matters for finance teams
Twenty years of expense data, now queryable in AI
Expensify runs on one of the most battle-tested expense data models in the industry. The MCP server doesn't flatten that into a spreadsheet, but exposes the real structure (reports, categories, receipts, approval states) to your assistant.
This is AI expense management: you ask a question, and your AI assistant answers in realtime.
Bring your own card, your own AI assistant, and your own workflow
There's no seat to buy and no admin gate to clear before you can start. If you have an Expensify login and an MCP-capable assistant, you're ready to go.
The AI inside the app and your external agent share the same data
Expensify's built-in Concierge AI and the assistant you connect over MCP read from the same source in realtime. It isn't bolted on after the fact; it's native to the platform.

How to connect Expensify to your AI assistant
Each Expensify MCP setup below should take under five minutes. The OAuth flow handles authentication end to end. This means no manual API keys, no JSON to hand-edit, and no token-expiration headaches.
Connect Expensify to Claude (Claude Desktop)
Open Settings → Connectors.
Add https://www.expensify.com/mcp.
Tap through the OAuth consent screen to authorize.
Done. The Search tool now appears in Claude's tool list.
Learn more about connecting Expensify to Claude.
Connect Expensify to Cursor
Open Settings → MCP servers.
Add https://www.expensify.com/mcp.
The OAuth flow opens in your browser – authorize there.
Return to Cursor with the Search tool available.
Learn more about connecting Expensify to Cursor.
Connect Expensify to ChatGPT
ChatGPT needs developer mode turned on before it can reach the Expensify MCP server.
First, enable developer mode:
Open ChatGPT and go to Settings.
Select Apps, then Advanced settings.
Enable Developer mode.
Then, create the Expensify connector:
In Settings, select Apps, then Create app.
Name it Expensify, add a short description (for example, "Search your Expensify expenses, reports, receipts, trips, and tasks"), and set the connection to https://www.expensify.com/mcp.
Click Create, then complete the OAuth sign-in and approval in your browser.
Click Allow.
To use it, open a new chat, click the + button near the message composer, select More, and choose the Expensify connector.
Learn more about connecting Expensify to ChatGPT.
Connect Expensify with OpenClaw (self-hosted or one-person companies)
Use the general MCP setup that works for any compatible client:
Open OpenClaw and find its MCP or integrations settings.
Add a new MCP server connection pointing to https://www.expensify.com/mcp.
Sign in to Expensify when prompted.
Review the requested permissions, then approve the OAuth access request.
Head back to OpenClaw and test it with a natural language query, like "What did I spend on software last month?"
What to actually ask once you're connected
This is where the connection earns its keep. Group your queries by what you're trying to get done. Here are some suggestions to get started.
For individuals
"What did I spend on travel this month?"
"Do I have any expenses that haven't been submitted yet?"
"Show me all my expenses over $100 that are missing receipts."
For managers
"Which of my team's expense reports are waiting for my approval?"
"Summarize my team's spending by category for the last quarter."
"Are there any reports from my team that have been sitting unsubmitted for more than a week?"
For accountants
"Pull all expenses for [client name] from last quarter, broken down by category."
"Which of my clients have outstanding expense reports that haven't been submitted?"
"Summarize this month's spending for [client name] compared to last month and flag anything unusual."
For finance teams
"What's our total outstanding reimbursable amount right now?"
"Find all expenses this quarter that are missing receipts and are over $75."
"Show me all outstanding invoices sorted by age."
Security and trust: What your AI can and can't do
Connecting an AI assistant to your financial data is a fair thing to be cautious about. Here's how the Expensify MCP server keeps that connection locked down:
It uses OAuth 2.1 with PKCE, so Expensify never hands your password or a long-lived API key to the AI client.
You approve every connection on an explicit consent screen, and you can revoke access any time.
Access is read-only at launch. Only the Search tool is exposed, scoped to the permissions you already have. The AI can read what you can already see, but it cannot approve bills, edit transactions, lock cards, or move money.
Read-only is the point, not a limitation. Your assistant can analyze everything and change nothing, which means you get the speed of natural-language answers without handing over the keys. Starting with the tightest possible scope is how a financial product should earn that kind of access.
Get started with Expensify’s MCP
Once you connect an assistant, doing your expenses gets as simple as asking a question. No exports or digging through reports. Get the answers you actually need, stat. Check out Expensify's AI assistant setup guides and connect yours in under five minutes.
FAQs about Expensify’s MCP
-
It's a native Model Context Protocol server, hosted at https://www.expensify.com/mcp, that lets any MCP-compatible AI assistant query your Expensify expenses, reports, invoices, and receipts in realtime after a one-time OAuth authorization.
-
In Claude Desktop, open Settings → Connectors, add https://www.expensify.com/mcp, and complete the OAuth consent screen. The Search tool then appears in Claude's tool list.
-
Yes. Expensify has official setup guides for both, along with Claude. Cursor connects through its MCP servers settings. ChatGPT takes a couple of extra steps: you enable developer mode first, then create an Expensify connector pointing to the MCP server.
Other MCP-compatible assistants may also work, even without a dedicated guide.
-
Yes. It uses OAuth 2.1 with PKCE, never exposes your password or a long-lived API key, requires explicit consent, can be revoked anytime, and is read-only at launch.
-
No, if you have an Expensify login and an MCP-capable assistant, you can connect.
-
No. Only the read-only Search tool is exposed, scoped to your existing permissions.